")

Paid partnership with B&Q
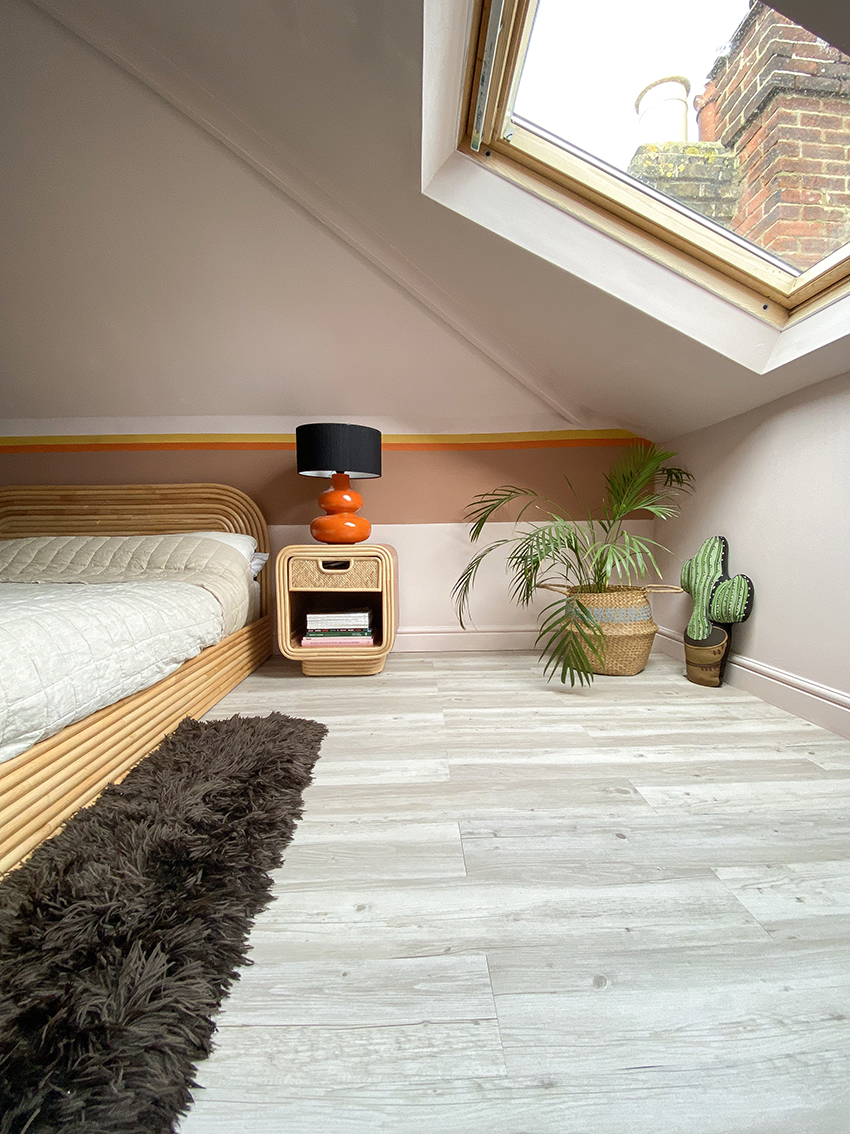
When we made the first visit to our rented home, the selling point for me was a huge loft conversion complete with skylights. I’d spoken time and time again about it being my dream to live in a home with a loft bedroom, and there we were viewing a property that had exactly that (albeit needing a little bit of work).

When B&Q got in touch to work with me again (you can see my tips to updating a rented bathroom here), I knew the first room I wanted to tackle was the master bedroom. After all, bedrooms need to be relaxing and amongst all the chaos of the move, a place to sleep is fairly essential. My vision? To create a 70s-inspired boudoir with a retro colour scheme and wooden flooring.
The job in hand was altogether not that difficult; some painting, a refresh of the floors and some styling. We wanted to achieve a retro looking room with minimal effort. You see, renting doesn’t have to be boring! You can still make simple updates to your home without damaging the existing structure. Happy you and a happy landlord! How do you think we did? Scroll on through to take in all of the after pictures and my top tips for getting your own rented paradise.

How to update your rented home:
If you’re looking to update you own bedroom, the sky can be the limit! You should always consult your landlord first to ensure that any changes are approved but do note that the more you pitch your idea, the more likely they are to buy into it. Set about creating a moodboard and plan to show them you know what you are doing.

1. Update the flooring
We used the GoodHome Poprock Self-Adhesive Wood Vinyl Planks to update our previously carpeted flooring. The landlord had already pulled this up for us, so there was a great plywood base to lay over, but you could use any underlay or lay directly over old laminate. The peel and stick planks are easy to cut and can be pulled up with no damage to the flooring underneath. They even look and feel like real wood thanks to the grooved texture – I much prefer them to laminate options which tend to be glossier in appearance.
Shopping list:
- GoodHome Poprock Rustic White Wood Effect Self-Adhesive Vinyl Plank | £12.21 for a 1.11m² Pack
- Magnusson 62mm Steel Blade Retractable Knife | £6.98
- Magnusson Profile Gauge | £10
- Knee Pads | £16

2. Prepare the walls
The preparation of walls is often where people fall short in decoration. Don’t cut corners and prep your walls properly to ensure the best possible finish. Get started by filling any holes or dents, sanding down any lumps of excess paint and washing your walls down with Sugar Soap (this removed any hidden dirt or grease). These simple prep steps can really change how your walls look in the end and I highly recommend you carry them out!
Shopping list:
- Polycell Multi-purpose ready mixed filler 330g | £2.75
- Sugar Soap | £3.28
- Angled Sponge Scourer | £2.48
- Dust Sheet | £15.97


3. Paint the walls with personality
Pitch to your landlord! Walls can always be painted back white at the end of your tenancy so show your landlord that you can be trusted to paint. I’m an advocate for painting and I truly think it’s worth the effort – previous landlords have even kept my schemes as they’ve loved them so much.
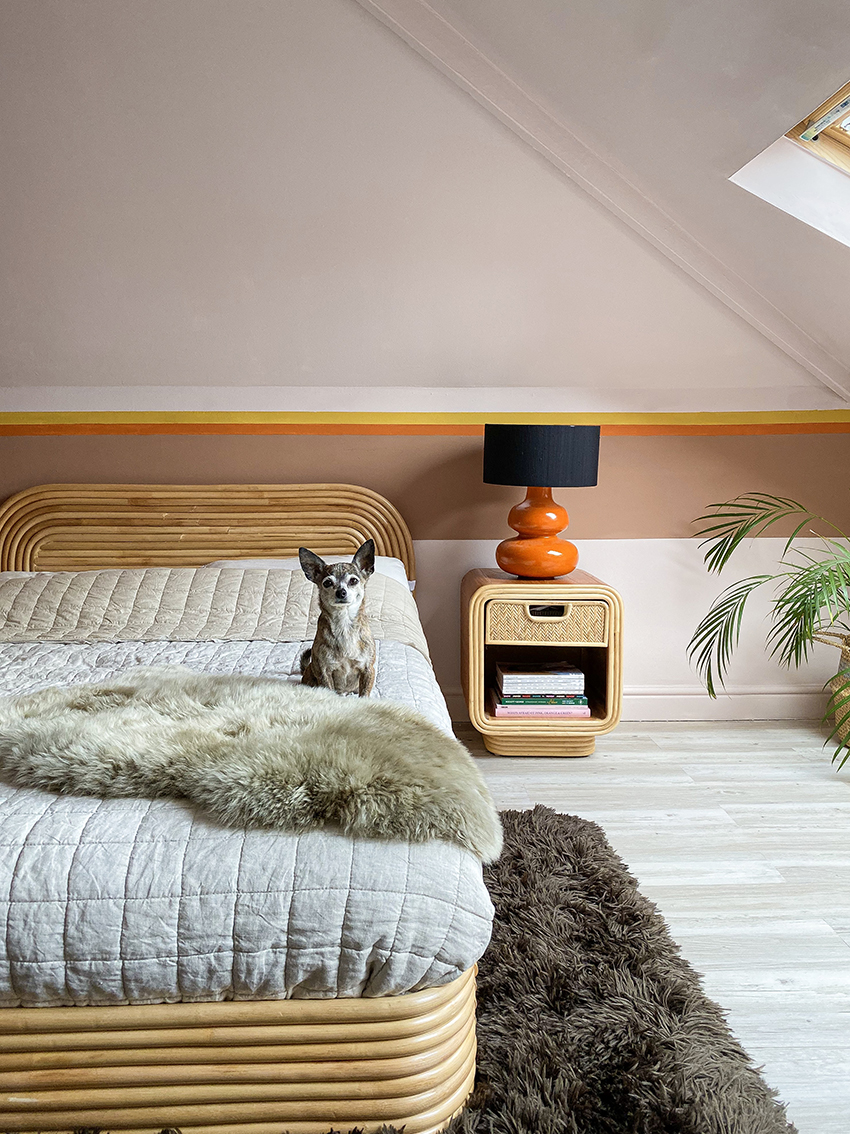
Think outside the box and add bright shapes or a clever mural to add personality. As you can see in these pictures, we went all out with a 70s colour palette, using a nude pink base colour and adding thin and thick stripes with one of my rental ride or dies, Frogtape. I’m seriously in love with this colour scheme and love how simple it was to create. The GoodHome paint range comes in a multitude of colours and went on our walls in a one-coat dream.
Shopping list:
- GoodHome Wall and Ceiling Matt Emulsion Paint in Kyoto (Base Paint) | 5L for £20
- GoodHome Wall and Ceiling Matt Emulsion Paint in Chueca | £1.30 (you only need a tester!)
- GoodHome Wall and Ceiling Matt Emulsion Paint in Barranquilla |
- GoodHome Wall and Ceiling Matt Emulsion Paint in Aravaca | £1.30 (you only need a tester!)
- Frogtape Masking tape | £8.74

4. Add the finishing touches.
As with any interior design scheme, it’s all about the finishing touches. Finish the look with a mix of vintage furniture pieces and accessories from the B&Q range. We opted for a large brown shaggy rug and a cappuccino sheepskin. Seriously, the B&Q rug collection is SO affordable and very chic. We were tempted by many more styles. Plus, the best thing about B&Q? You can get all your plants at the same time. Don’t forget about the plants folks!
Shopping list:
- Large Avalyon Brown Rug | £115
- Imlu Cappuccino Sheepskin Rug | £35
- Butterfly Palm Plant | £34
What do you think of our new retro bedroom? Let me know in the comments. For more interior inspiration, colour clashing and general life admin, check out the rest of my blog. Follow me on Instagram, Pinterest and Twitter for more of the EJP in your life.
This is absolutely bangin!
It’s so you and so gorgeous. Good luck leaving it every day though haha x
Hahaha, thanks love! It’s a hard life….
love this! where are the orange bedside lamps from?
Thank you! They are the Lantana Lamp from Habitat!
[…] Image credit : Emma Jane Palin […]