")

Paid partnership with IKEA
One of the most testing challenges I face as a blogger is promoting responsibly. In a world where we need to be cautious of what we’re buying, getting rid of and recycling, it’s increasingly hard to get the balance right between filling my home with furniture and not enabling others to buy products that they don’t actually need. In the past I’ve been guilty of getting rid of furniture (albeit via charity shops and services like the British Heart Foundation), when perhaps I could have reworked it instead of buying new. Let’s face it, nobody is perfect when it comes to living an entirely sustainable lifestyle, but thinking about these things is certainly a step in the right direction and a goal we should all be looking towards.
When IKEA got in touch earlier this month about working with them on a campaign to reinvigorate an item of furniture, you can bet I was on board. Did you know that IKEA is committed to becoming a circular business by 2030? That means designing products that are 100% circular, created to be repurposed, repaired, reused, resold, and recycled, generating as little waste as possible. I’ve been behind the scenes at IKEA Tottenham so I know this is at the forefront of all their messaging. A company after my own heart.

Anyway, back to the task at hand. I’ve been itching to get my teeth stuck into an IKEA hack (probably have my DIY queen and king pals Bianca Hall, Malcolm Begg and Melanie Lissack to thank for that) and this was the perfect opportunity. I had an old IVAR unit we used for storage in a cupboard (I mean who doesn’t have a bunch of IKEA bits as a renter) so I decided to give updating this a whirl, and I knew exactly what I wanted to do with it too. Did someone say fluted wood?

Ribbed and fluted styles have been all over the design world this year and I’ve been seriously thinking of investing in a piece. Seriously, Milan Design Week had me going ga-ga for the stuff. However, when I actually thought about it, I realised this aesthetic could easily be attained by a simple DIY, and I was right. So folks, here’s how to update your own IKEA IVAR cabinet to create a bespoke ribbed/fluted wood cabinet that will have all your friends asking where you got it from…

You will need:
–IKEA IVAR Cabinet (I had the 80x50x83 cm unit)
–Smooth Stripwood (15 x 15 x 90mm strips) x 14
-Gorilla Wood Glue
-G-Clamps
-Mini saw
-Suitable Workbench
-Hand sander
-Primer
-Furniture Paint
-Paintbrushes or rollers
-Tools (Allen Keys & Screwdriver)
If you’re looking to add handles and feet:
-Drill and Drill bits
-4 x feet
-2 x handles

1. Build / take off your doors.
Number one and the easiest of them all. If your IVAR is already built, take off the doors. If not, build up to the point of adding on the doors instead!
2. Cut your wood to size.
I used 15 x 15 x 90mm strips but if you can find some of the exact length already, go for it! I simply cut off the excess with a mini saw which was super easy to do and didn’t require very much manpower.
3. Measure out your ridges!
I wanted a fairly small distance between my ridges so I laid a strip on either side of the door and played around until it looked the way I wanted it to. This worked out at needing 7 strips in total with roughly a 10mm gap in between each one. I’m really not a perfectionist and the effect is forgiving so don’t get too caught up in measuring.


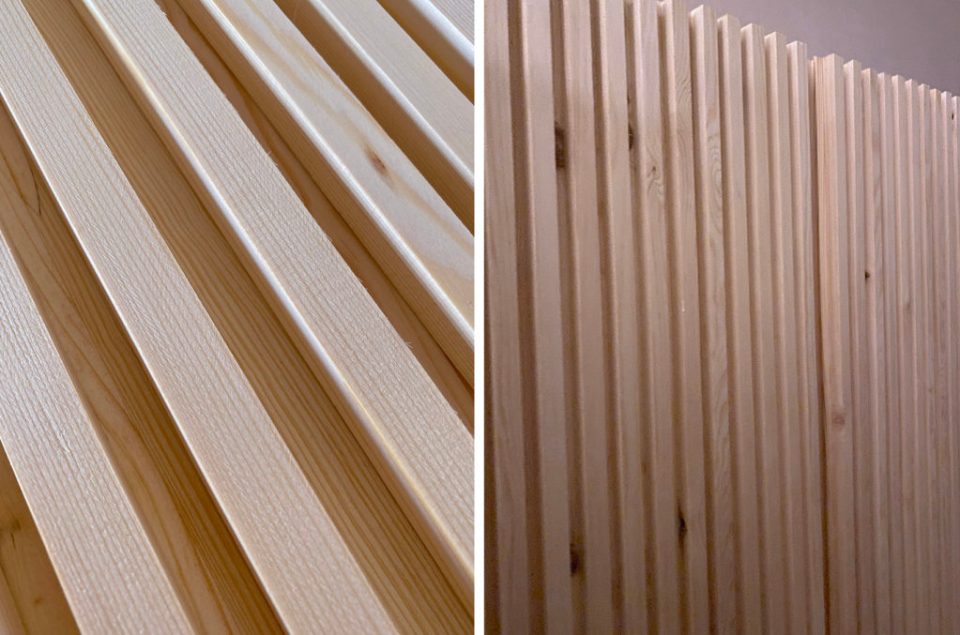
4. Glue the wood strips to the doors.
This really couldn’t get any easier. Gorilla wood glue is perfect for sticking wood on wood and takes hardly any time to dry. Simply apply the glue to one side of the strip and stick into place. You can then use a g-clamp to keep in place for 20 minutes or so. Repeat until all strips are in place and both doors are looking lovely and ribbed.
5. Sand down the door edges.
As each piece of wood might be slightly different, it’s best to give the top and bottom of your cabinet a little sand to make sure it’s all in line. You can judge this at the time. Be careful not to sand too much off the actual doors as you want them to fit flush when you pop them back on.
6. Prime your cabinet.
If you’re using a paint that requires a primer (we bought one that already had primer mixed in), prime your cabinet and doors and leave to dry.

7. Paint or stain your cabinet.
The beauty of the IVAR unit is that it’s pretty much DIY ready. You can paint it or stain it without having to sand. While I chose to paint the cabinet in the same colour as my walls, you could do absolutely anything you wanted to – we nearly opted for a neo mint colour but decided against late on.
8. Re-assemble you cabinet.
Do I need to go into more detail? Just pop your doors back on and hey, presto!

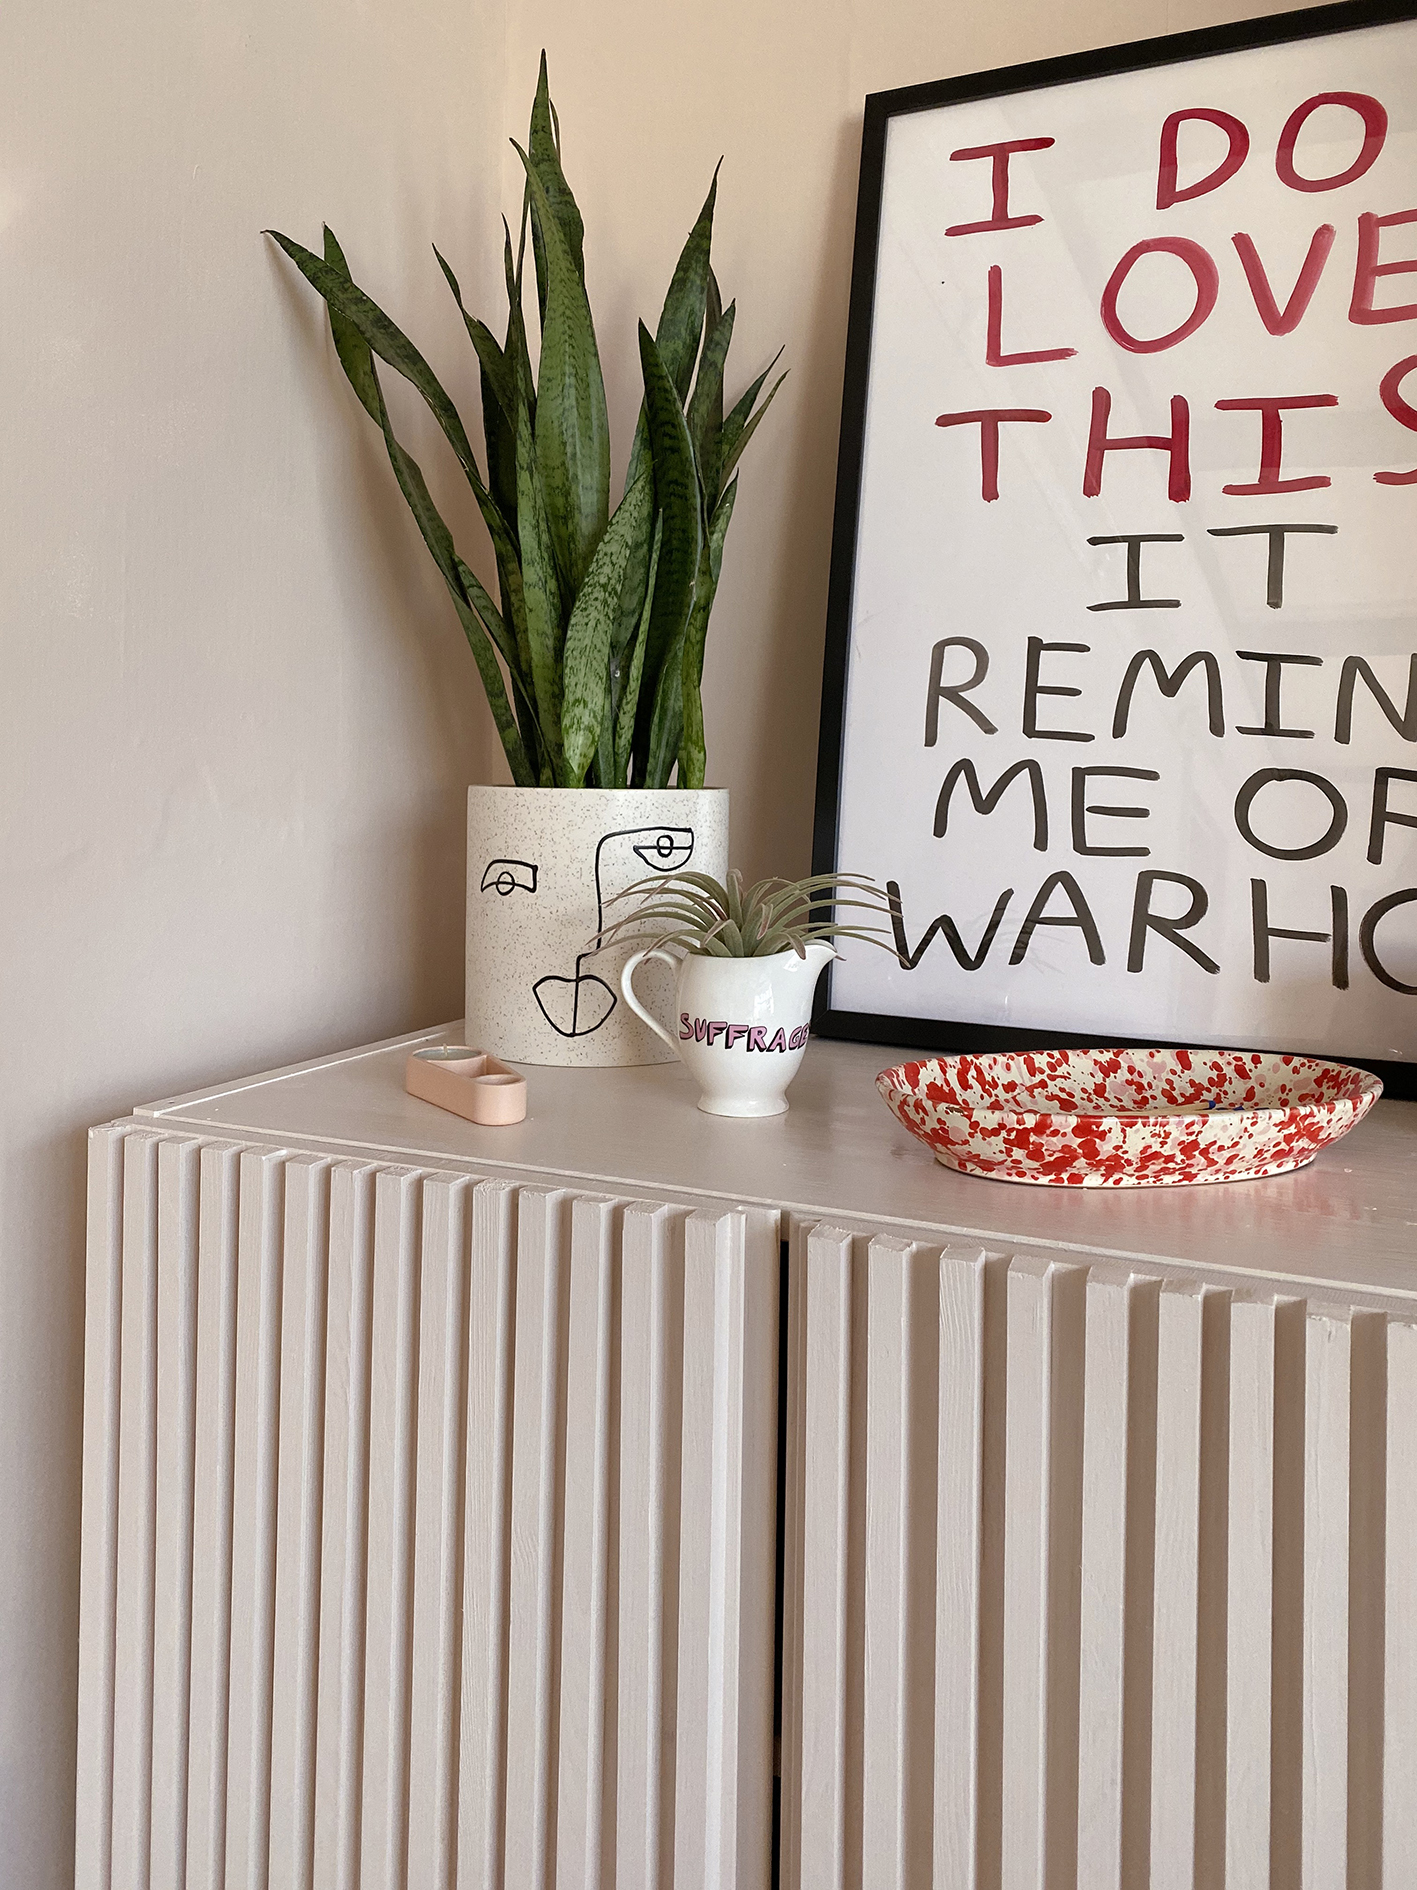
So there you go, a completely bespoke fluted wood cabinet created from the IKEA IVAR cabinet. All for about £100 too (you really can’t argue with that!) While we decided that we wanted to keep our IVAR cabinet simple so that it blended in, you could also add feet and handles to yours if you so wish. You would simply need to drill holes in the unit and add – EASY. I’m so happy with how it turned out and consider my fluted wood obsession and my IKEA hack mission fulfilled.
Have you ever hacked an IKEA item? Or have you tried this one? Let me know in the comments! For more interior inspiration, colour clashing and general life admin, check out the rest of my blog. Follow me on Instagram, Pinterest and Twitter for more EJP in your life.
[…] I love this idea from Emma Jane Palin. It’s a really affordable way to achieve a bespoke ribbed affect (which like cane, is another look that is quite on trend ). Check out her blog for the full tutorial . […]
[…] I love this idea from Emma Jane Palin. It’s a really affordable way to achieve a bespoke ribbed affect (which like cane, is another look that is quite on trend ). Check out her blog for the full tutorial . […]
[…] Credit: emmajanepalin.com […]
Hello! Could you please share the exact paint colour you used? It looks as if it’s almost a thinned out white wash?
Thank you!
Hello, it’s Valspar Pink Alabaster (for wood) x
[…] via […]
[…] Emma Jane Palin transformed a basic IKEA IVAR cabinet into a stylish storage piece with wooden strips. The end […]
Hi! Where is the poster from? Love it!
Hey! Its Babak Ganjei – an incredible artists – https://www.babakganjeiworks.com/?category=Prints
[…] great for adding texture to IVAR cabinet fronts for a look that’s minimalist-with-a-twist. Here, Emma gave her IVAR cabinet an on-trend ribbed look using stripwood. She left it unstained for a natural look; you could also stain or paint it a color […]
[…] great for adding texture to IVAR cabinet fronts for a look that’s minimalist-with-a-twist. Here, Emma gave her IVAR cabinet an on-trend ribbed look using stripwood. She left it unstained for a natural look; you could also stain or paint it a color […]
[…] This IKEA Ivar cabinet DIY hack is more ribbed that fluted perhaps. By placing the wood trim on the front of the cabinet, Ivar suddenly looks expensive and unique! You can see this hack here on Emma Jane Palin’s site. […]
[…] Ribbed cabinet DIY using the IKEA IVAR from Emma Jane […]