")


The No.1 rule of Print Club is to ALWAYS talk about Print Club.
I’ve never been one to doubt my pulling power so when a little email from the lovely folk at Print Club London pinged into my inbox offering a chance to use their facilities, I didn’t hesitate to say yes.
Having studied Graphic Design and Illustration at the University of East London, I’ve had previous experience in screen printing (you might remember my escapades with Daniel Heath), but I have to admit I certainly wasn’t feeling confident in my abilities at said moment and was totally looking forward to a good ol’ time with the jet-wash and a pot of emulsion.

Having mulled over the various choices of courses, I opted to try out the fabric workshop for something a little different, and to finally get some EJP designs on some tees!
The course allows you to print on to either totes or t-shirts and although the peeps at Print Club are pretty generous, you do have to bring these along with you. I picked up some 100% cotton (for full on absorption) long sleeved t-shirts from the men’s section at Primark – at £3 each, you can’t go wrong! For bags, the experts recommend The Clever Baggers who are cheap but good quality and again 100% cotton to ensure the ink is fully absorbed.

After enlisting the company of the lovely Ella to take part, we arrived eager and excited, to be greeted by the wonderful Indra, Sophie and Louis – just a few of Print Club London’s amazing technicians – for a day of creativity. After introductions, some history of screen printing and a little bit of an explore of the studio, it was time to set to work. For ease, the rest of this blog post explores a step-by-step guide to the process and what you can expect from taking part in a workshop yourself! If you have any questions, please just give me a shout!

Stage One // Preparing your design
You need to come equipped to the workshop with an A4 Black & White Design which is essentially ready to go. No worries if you’re not quite a photoshop pro as the technician on hand (Sophie in this case) will seamlessly talk you through the process of ensuring that your image is screen print ready.
If you’re planning on using an illustration, the technician will ensure there are no marks or specks surrounding the image and ensure it’s also converted to greyscale for the best possible print. If you’re using a photograph, you can use a method called ‘halftone’ – the reprographic technique that simulates continuous tone imagery through the use of dots, varying either in size or in spacing, thus generating a gradient-like effect and a really effective optical illusion.
As you can see, I opted for one of my crazy patterns in a circular design, while Ella created a beautiful illustration on some crazy short notice. Once prepared, all that’s left to do is print your design on to transparent paper/tracing paper, ready for the next stage!

Stage Two // Preparing and exposing your screen
Preparing your screen can be a little bit daunting as there are a few things that could go wrong along the way, but not to worry as again, the technicians are on hand to ensure that you’re setting everything up correctly. Excuse the dimly lit photos, but these are the conditions required to ensure that the emulsion used in screen printing doesn’t react to light.
Coating a screen is simple really but requires a firm hand and a knack for a 45-degree angle. You need to evenly spread the emulsion from the bottom of the screen to the top ensuring that there are no missing spots within the mesh. The screen then needs to dry for a while, in which time you’ll have the chance to learn about different inks, screens and squeegees.
After a short time, it’s time to expose the design using Big Bertha, PCL’s professional exposure unit. I won’t delve too much into the details of this but essentially using light and a vacuum, some magic happens and your design ends up engrained into the screen – wonderful!


Stage Three // Drying your screen and preparing it for printing
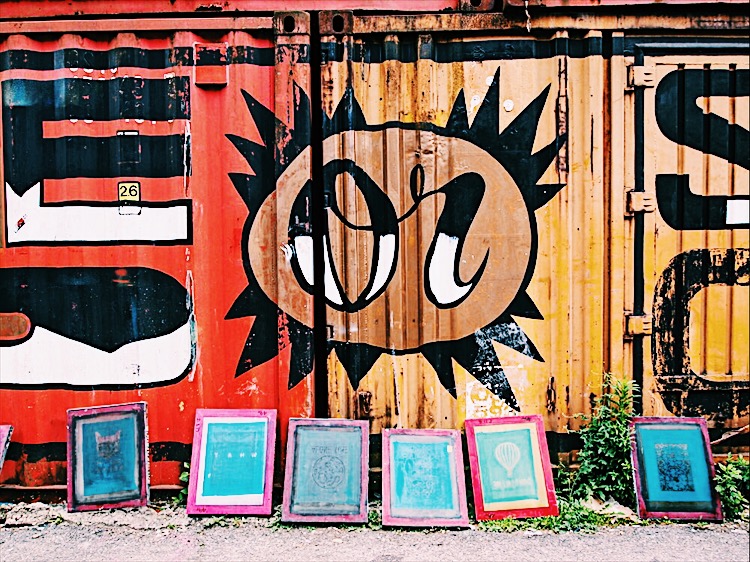
Once again, your screen needs a little time to dry off and on a sunny day, Print Club provides the perfect colourful shipping container backdrop. This is your chance to take a nosy at everyone else’s work as well as see examples of other printing techniques and some insane work from other Print Club London members. The process does take a while so here’s where the day also breaks for a bite to eat and a catch up with the other creatives on the workshop.
After lunch, you need to inspect your screen and ensure there are no gaps within it. You will start by going around the border with tape and then use a lightbox to look out for tiny specks or ‘pinholes’ within your design. By getting rid of the pinholes, you’re ensuring that no extra ink gets through onto your final print – the spotty look isn’t always good!


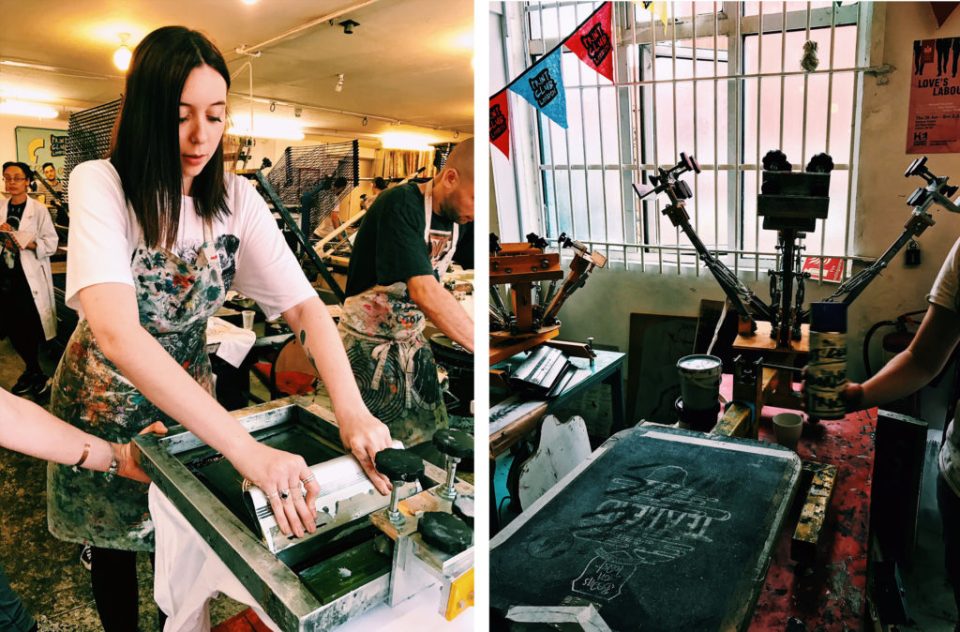
Stage Four // Pulling your print
Now for the scary part! Needless to say, you need to decide exactly where you would like your design to go on your garment and alignment isn’t always simple. By taping your design to your clothing, you can fully match up the screen to your design. Once this is locked in you’re pretty much ready to go. Again, don’t worry, the technicians talk you through every stage to ensure that you dont f*** it up.
As this is still a beginner’s workshop, you can only use black or white ink for your design and this is applied generously to the bottom of the screen. You can then demonstrate that pulling power by pulling at a 45-degree angle, pushing down with a firm pressure. Pro’s will do it one go but it may take a couple of pulls to ensure that the ink has fully covered your tee. The final step is to cure your t-shirt by putting it through a heater in order to bond the ink to the fabric, and then, hey presto, you have a finished item!

Stage Five // Cleaning up
Of course, there’s the tidying up part too and it wouldn’t be fair if I didn’t mention this part. You need to ensure that your screen is ready for someone else to use and this involves bringing it back to its original state.
After a good scrub down with a washcloth, you’re allowed to get chemical and have a go in the washout booth with the jet spray. This is definitely the fun part and makes you feel pretty in charge – you’ll also be amazed at how quickly your screen returns to a blank state. More drying time and that’s it, the day is done, minus seeing everyone else’s results of course and potentially moving on to stage six. What do you think of my finished design?

Stage Six // Becoming a member?
Once you’ve taken part in a workshop with Print Club London, you’re free to become a member and have access to the studio 24 hours a day. For £100 ( including VAT ) a month you can have unlimited access and 9 hours pre-booking time per week for a printing session.
A session is made up of 3 hours of booked time on a screen bed or the T-Shirt carousel. Any coating, cleaning of screens and art working can be done outside of your three x three-hour session. However, if you have used up your weekly sessions, any un-booked sessions that aren’t being used by other members can be used at no extra cost.
Personally, I think this is bloody brilliant and I can’t believe there isn’t a waiting list out the door for these services. With no contract, you can even just use it for a month if you have a project you need to work on – that’s insane and it will 100% be at the top of my list should I need to print some designs in the future.

I hope that this step-by-step run-through has given you a little insight into the workshops run by Print Club and again if you have any questions please do just drop me a line. The fabric workshop costs £65 to take part in and workshops run every Thursday from 11-4pm. You can book it here: https://printclublondon.com/shop/beginner-workshops-t-shirt-tote-bag-printing/
It could be a wonderful team-building exercise, just a lovely day-off from work, or even a gift for something different. I had such a lovely time getting to know the team and learning a little more about how they are working within the design world, so I’m pretty sure you would too. REMEMBER: The No.1 rule of Print Club is to ALWAYS talk about Print Club so do spread the word!
DISCLAIMER: As I previously mentioned, this course was offered to me for free but I wouldn’t let y’all know about it if I didn’t think it was a great deal and I can hand on heart say that I would book this for someone else as a gift.
Love this! I love screen printing and wish I’d made more use of it when I was at uni. Your t-shirt is beaut!
Chloe
chloehford.com
Same – I really didn’t make enough use of it! Although the first one I ever did was a 4-colour which I feel is highly ambitious, hah. Thanks so much, I now have five of the same t-shirt.